The following outlines how to add new products to your website and sync them with your Square POS (point of sale) or inventory management system. If there is something you’re having a problem with please contact us.
All tutorials assume you are logged into WordPress (WP) with full Admin rights. Your menus may look different from screenshots based on your “rights” or custom features on your site. (updated 08/07/2019)
### Table of Contents ###
- Add a New “Simple” Product to WooCommerce & Sync with Square
- Add a New “Variable” Product to Woocommerce & Sync with Square
Add a New “Simple” Product to WooCommerce & Sync with Square
A “Simply Product” is a product that does not have options for the customer to select and only consists of a single inventory item.
- On the left menu hover over “Products” > click “Add New”
- Give the product a descriptive name
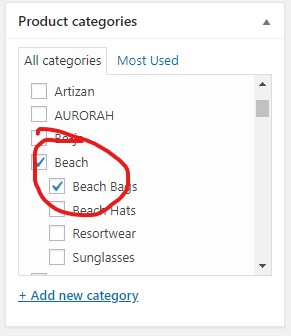
- Assign the product to ONLY 1 relevant category (NOTE: only 1 category will be synced with Square)
- Add product tags to organize the products on the site. Use only existing tags. As you start typing they will suggest. e.x. jewelry.
- Upload the Product Image
- Upload “Gallery Images (if applicable).
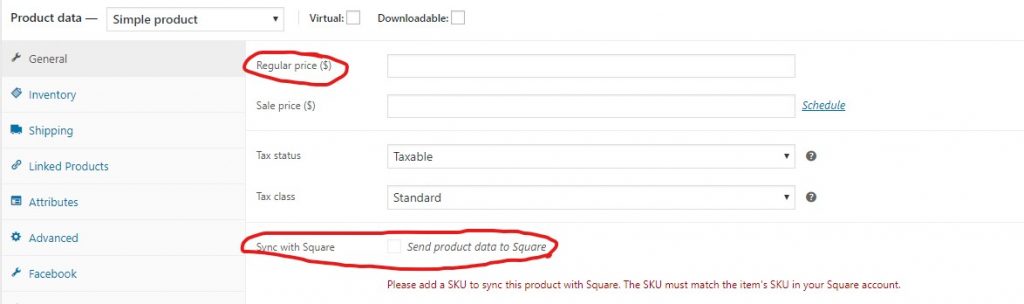
- Under the “General” tab assign the product a price (NOTE: ensure “Send product data to Square is CHECKED)
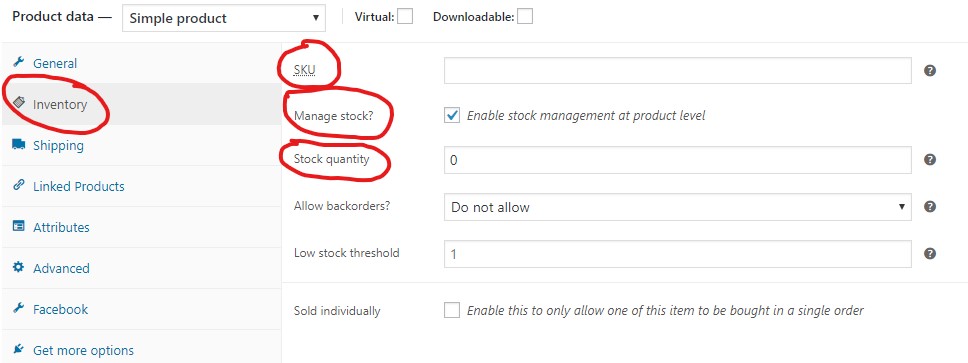
- Under the “Inventory” tab assign the SKU & Stock Qty (NOTE: ensure “Enable stock management at product level is CHECKED)
- THIS IS THE BARE MINIMUM… You can now click “Publish”
- It is recommended that you also fill out a “short description” at the bottom of the page and any other relevant information you have about the product. The more information you can provide about each product, the better!
Add a New “Variable” Product to WooCommerce & Sync with Square
A “Variable Product” is a product with options for the customer to select and EACH option corresponds to a single inventory item. e.x. Shirt in sizes Small, Medium, and Large … each sized shirt is its own inventory item. For sake of Syncing with Square you many only have ONE set of variations. e.x. you may have shirt select size, however you may not have shirt select size AND color.
- On the left menu hover over “Products” > click “Add New”
- Give the product a descriptive name
- Scroll down and select “Product data” > “Variable Product”
- Assign the product to ALL relevant categories (NOTE: only 1 category will be synced with Square)
- Upload the Product Image
- Upload “Gallery Images (if applicable).
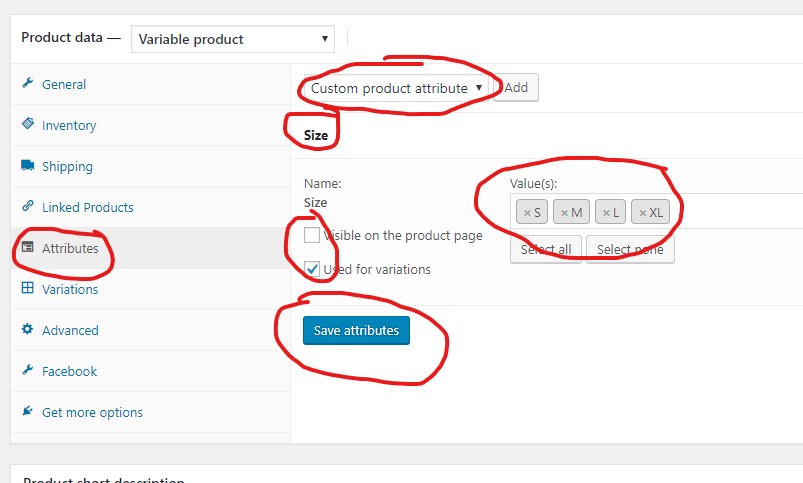
- Create your “Attributes”
- Click “Attributes” > from the drop down select “size” > Click “Add”
- Uncheck “Visible on the product page”
- Check Used for variations
- In the box labeled “Value(s)” Click and select each value that you wish to use or “Select All”.
- Click “Save attributes”
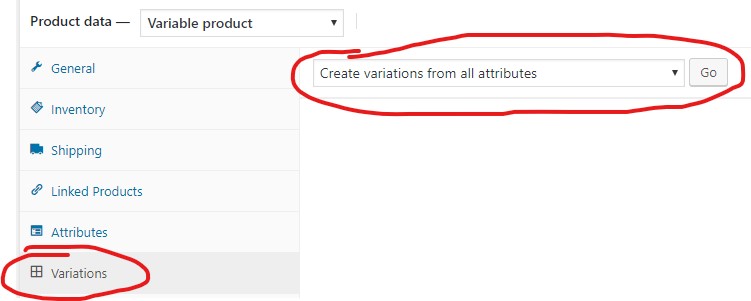
- Next click “Variations”
- Click the “Add Variations” drop down and select “Create variations from all attributes” and click “Go”
- Click “Ok”
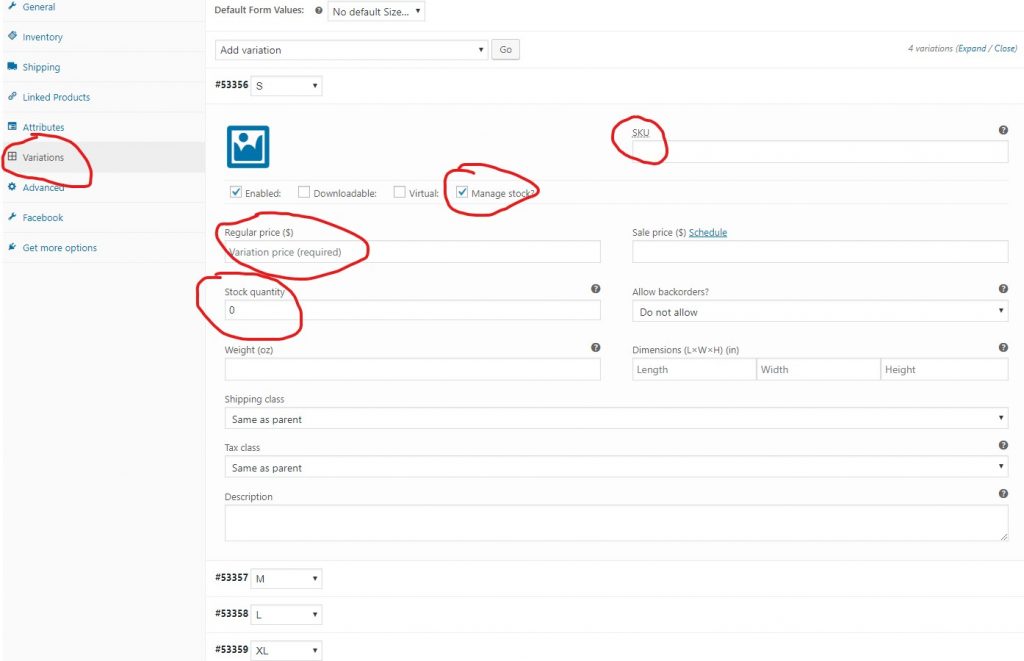
- You have now created a new product for EACH variation (size)
- Next Click on each size and enter SKU, Price,and Stock QTY. Do NOT enter a description, as the description should be in the “Product short description” box on the parent page.
- Click “save changes”
- Once all variations have been added click “Publish” (NOTE: once you’ve published the product once, the button says “update” not “publish” … regardless it is nothing more than a save button.)