The following outlines how to perform various tasks on your website. If there is something you’re having a problem with please contact us.
All tutorials assume you are logged into WordPress (WP) with full Admin rights. Your menus may look different from screenshots based on your “rights” or custom features on your site. (last updated 03/23/2020)
### Table of Contents ###
- Edit Homepage
- Edit Products and/or Categories from the Website
- How to Edit Shipping Options in WooCommerce
- How to Create / Edit Coupon Codes for WooCommerce
- How to Change an Oder Status (reason order may not be showing in QBPOS)
- How to Fix an awkwardly sized image
Edit Site Homepage
The homepage of your site is often the first thing visitors see when navigating to your site, so let’s make it count! The steps below will outline how to edit all aspects of your homepage.
- Click “pages” on the left menu
- Click “Home”
- You should see a grid that looks like this… If you do not click on “use divi builder”
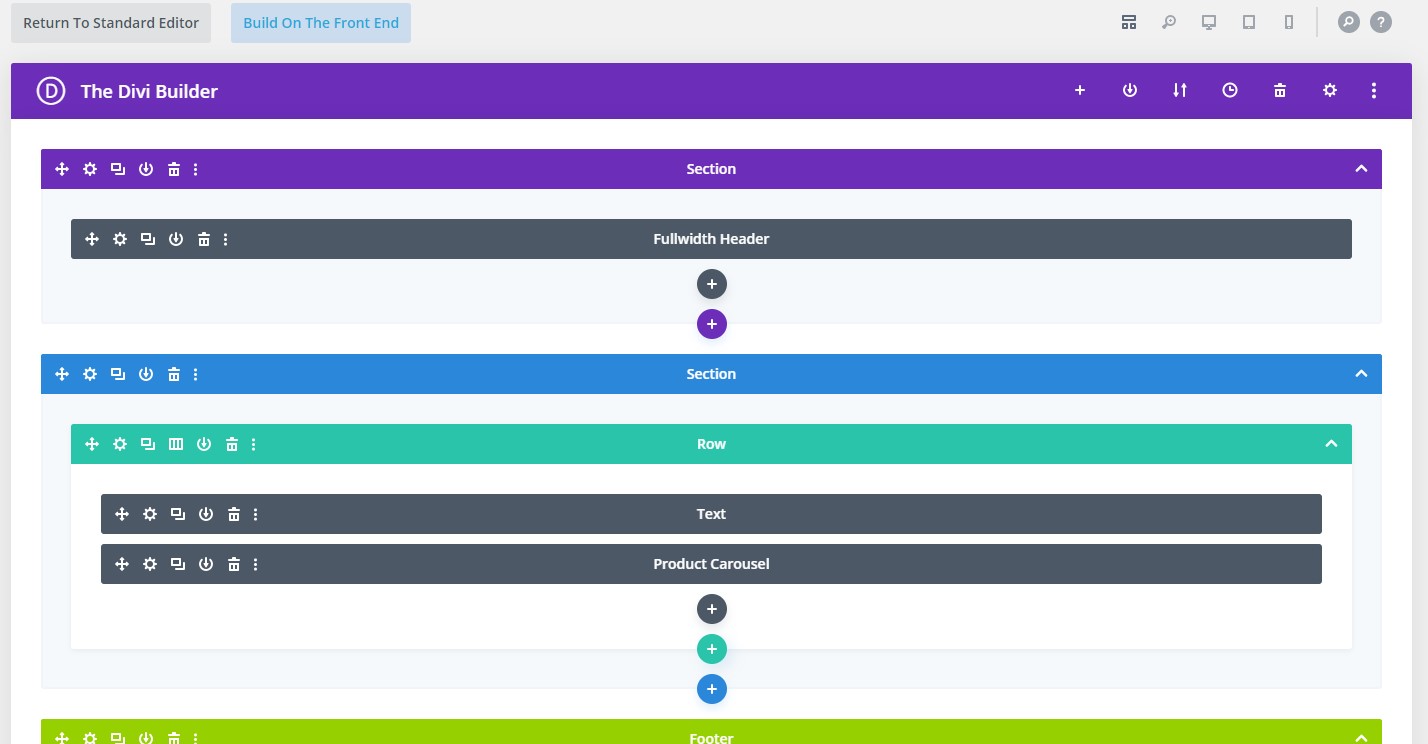
- Click on the small gear on the left of “Fullwidth Header”
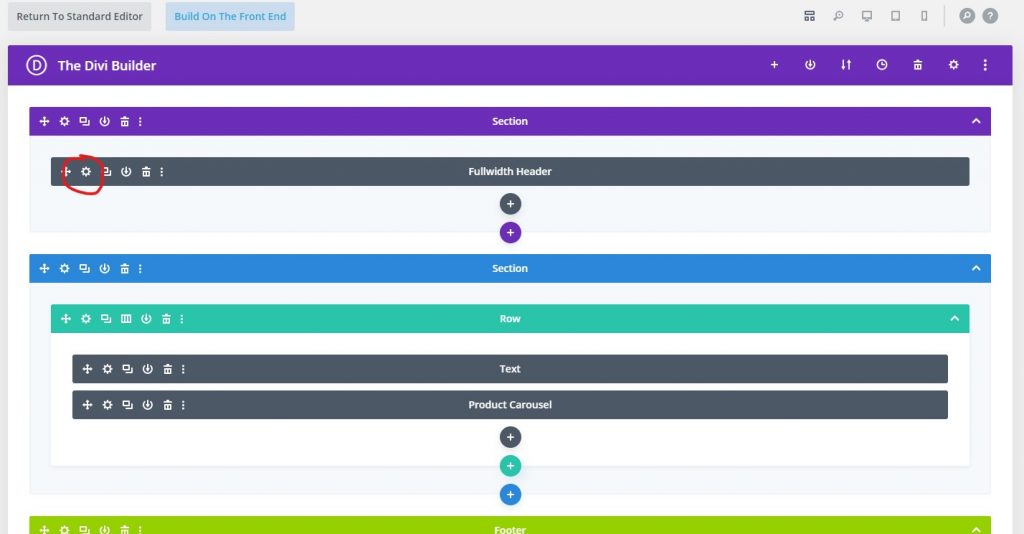
- Here you can edit the title text, buttons, button links. and background image. NOTE: Background image must be 1500px wide by 900px high, saved at a resolution of 72DPI
- When edits are complete click the “Green checkmark” (bottom right)
- Next you may wish to edit the products that show up on the homepage. To do so you need not edit anything on this page. Please skip to “editing homepage products“
- Then click the blue “update” button on the right

- That’s it!
- But wait…. did you make a mistake? is something broken? Fear not! Just above the “update” button you will see “revisions” … click browse and using the slider at the top of the screen select the revision before you started and click “restore This Revision”
- PROBLEM SOLVED!!! Start back at step 3.
Edit Products and/or Categories from the Website
Most of your products will be added and edited from Quickbooks POS. If you with to edit a product or category from the website, here’s how:
- On the left menu hover over “Products” > and click “Categories” to edit a category. This would be an area you can clean up duplicates, which we’ve discussed.
- To edit a product simply click “Products”
- You will see a list of all the products on your site. Search in the top right, or filter by category using the options above the products grid.
- Again, you will be editing most products on the Quickbooks side of things, but you may want to write a more robust product “short description” or add more image. “Products gallery” (bottom right) is where you add more images.
- Click “Update” after editing any product.
Edit Homepage Products
This outlines how to control which products will show up on the Homepage of your website
- From the left menu hover “products” and click “Categories”
- All products in the category called “000 Homepage Featured” will show up on the homepage

- Click the Number to the far right (the 8 in our example)
- From here you will want to add/remove products to/from this category, remembering anything in this category will show up on the homepage
- you can click any product and will find its category checkboxes on the right side of the screen
- The faster option is to use “Bulk Actions” at the top left of your product grid
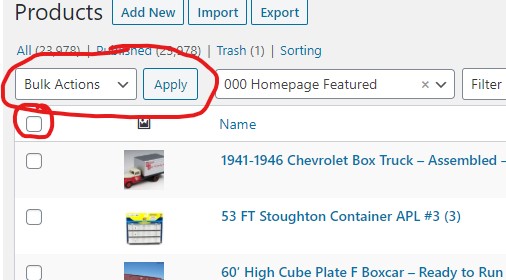
- Click the checkbox to “select all” and then choose “edit” from the dropdown and click “Apply”
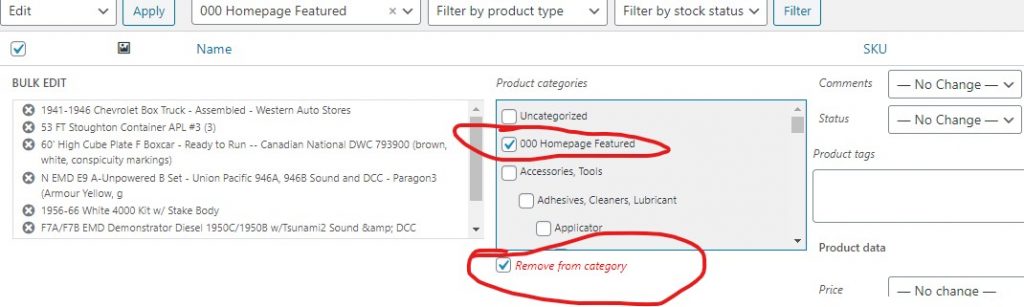
- Now click “remove from category” and click “000 Homepage Featured” and click the “update” button in the bottom right
- Next click the little “x” next to your current category

- Now search for the product(s) you would like to add to the homepage
- when you find them hover over and click “quick edit”
- On the far right you will select the “000 Homepage Featured” category
- Click “update” bottom right
- You’re all set! These products will now show up on the homepage!!!
How to Edit Shipping Options in WooCommerce
- In the left menu hover over “WooCommerce” and click “Settings”
- Click the “Shipping” tab
- Click The “Zone” you wish to edit
- However over the Method you wish to edit and click the “edit” button
- From there you can edit the shipping amount
- FREE SHIPPING can be edited in the same way (e.x. if you wish to change the purchase threshold or disable)
- If you wish to create dynamic or real time shipping quotes from your preferred or multiple carriers, this will require a bit more work to integrate.
How to Create / Edit Coupon Codes for WooCommerce
- In the left menu hover over “WooCommerce” and click “Coupons”
- Click “Add New” to create a new coupon code
- Click on any existing code to edit
- Always remember to click “Update” on the right when finished editing
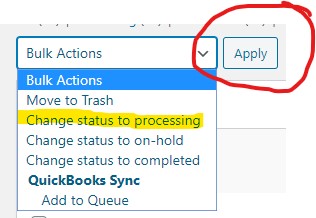
How to Change an Order Status
Only WooCommerce order statuses of “processing” and “completed” are synced with QBPOS. In certain circumstances you may need to change an order status.
- In the left menu hover over “WooCommerce” and click “Orders”
- Locate the order and check the box to its left
- Click on the drop down at the top of the order grid > Select “change status to processing” (or your required status) > click Apply
-
How to Fix an Awkwardly Sized Image
Your site uses a plugin called “Smart Image Resize PRO” to ensure all images are the same aspect ratio and your WooCommerce catalog lays out in a nice grid. On import from QBPOS the plugin may “miss” an image and not resize it. If you see an image on the site that looks incorrect do the following:
- Click on “Product”
- Locate the product who’s image you wish to correct & click on it.
- Scroll down and bottom right click on the image.
- Click “regenerate thumbnail”
- That’s it, image fixed!